

Grabber factory programming
This section provides detailed requirements and instructions for downloading and installing Quartus FPGA software.
1.1 System Requirements
To install and run Quartus Programmer software your system must meet the following requirements:
1.1.1 Minimum Hardware Requirements
- Windows or Linux workstation.
- A monitor capable of at least 1024 x 768 display resolution.
- Adequate disk space, free 1800-2000 MB, depending on your operating system.
1.1.2 Cable and Port Requirements
- USB-Blaster™ or USB-Blaster II download cable
- USB B cable
- USB port for connecting a USB-Blaster™ or USB-Blaster II download cable
1.1.3 Software Requirements
- Quartus Programmer
The Quartus Programmer Software can be found in:
https://nextcloud.kaya.vision/s/Quartus_download
Choose and download the relevant software for your PC. Run the application and follow the installation instructions. Enable installation of the JTAG driver for Configuration and Programming.
2 Image Programming
This section provides detailed instructions for KAYA Instruments’ FPGA board programming.
2.1 Pre Programming Connections
Perform the following connections and the steps listed, prior the factory image programming:
- Power down the PC.
- Connect the JTAG connector to the KAYA Instruments’ FPGA board according to your board’s as shown in the next section.
The JTAG connector shown in Figure 1. Pin 1 on the USB-Blaster™ cable must face the 1st pin of the JTAG connector. In case of any hesitation in detecting the JTAG connector on the FPGA board,
please contact KAYA Instruments’ representative.
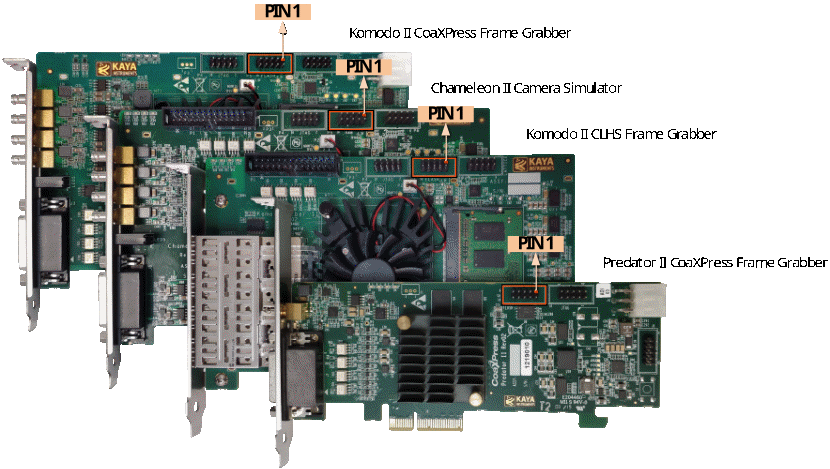
Figure 1 – Gen II boards with marked JTAG connector
NOTE: The USB port must be located on the same PC as the FPGA board.
The USB-Blaster™ and the USB B cable shown in Figure 2.
NOTE: The USB port must be located on the same PC as the FPGA board.
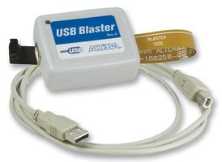
Figure 2 – USB-Blaster™ and USB B Cable example
3. Power up the PC.
2.2 Programming
To initiate factory image programming of the FPGA board follow the listed steps:
- Open
 Quartus Programmer.
 - Choose “Active Serial Programming” from the Programming “Mode” Selecting bar, as shown in Figure 3.
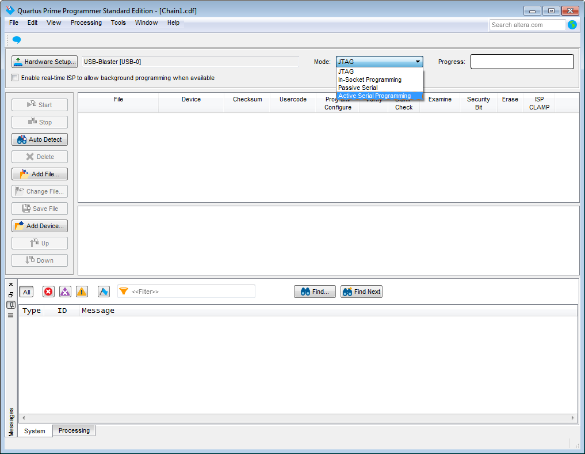
Figure 3 – Quartus – Choosing Programming mode
3. In case no hardware is detected, clicking on “Hardware Setup”, located in the left-top corner, will open a new window, where a USB-Blaster hardware can be chosen. This operation described in Figure 4.
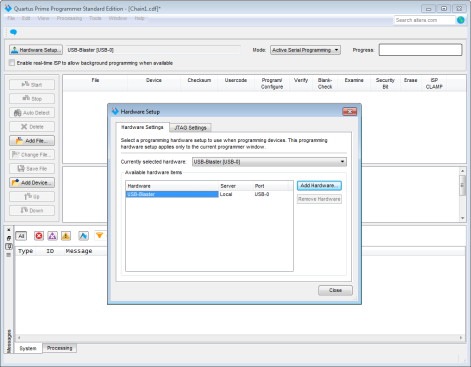
Figure 4 – Quartus – Detecting Hardware
4. Click “Add File” button, and select the desired firmware version, in accordance with the board chosen (.pof file extension). Please, pay attention to the type of the programmed device and its related firmware. Contact KAYA Instruments’ representative for any question.
5. Check “Program/Configure” and “Verify” options, in the check box as shown in Figure 5.
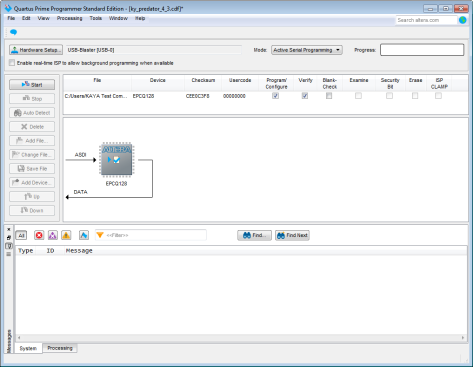
Figure 5 – Quartus – Programming Configuration
6.Click “Start” to initiate the image programming.
This operation may take up to 15 minutes and shown in Figure 6.
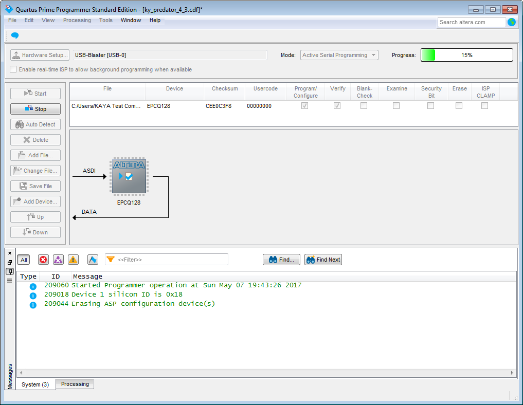
Figure 6 – Quartus – Programming Process
7. Do not interrupt the process!
In case of an error, the firmware update will fail and return to previous operation mode.
8. A successful update will result in reaching 100% on progress bars.
NOTE: A full PC shut down is required to initiate the new firmware.
9.Turn OFF the PC.
10.Remove USB Blaster from the board.
11.Turn ON the PC and enjoy.